Using OpenClaw with Agent Redactor
-
Configure Agent Redactor (do this first)
Before setting up OpenClaw, get the local redaction proxy running so OpenClaw can verify the connection. In the Profiles sidebar, select or create a profile. Set the Local URL to
http://localhost:8080/(or your preferred port), set Forward To to your real provider endpoint (e.g.https://openrouter.ai/api/v1), and paste your real API Key. The key is encrypted locally and never leaves your machine. Click Save All Settings and confirm the port shows as available.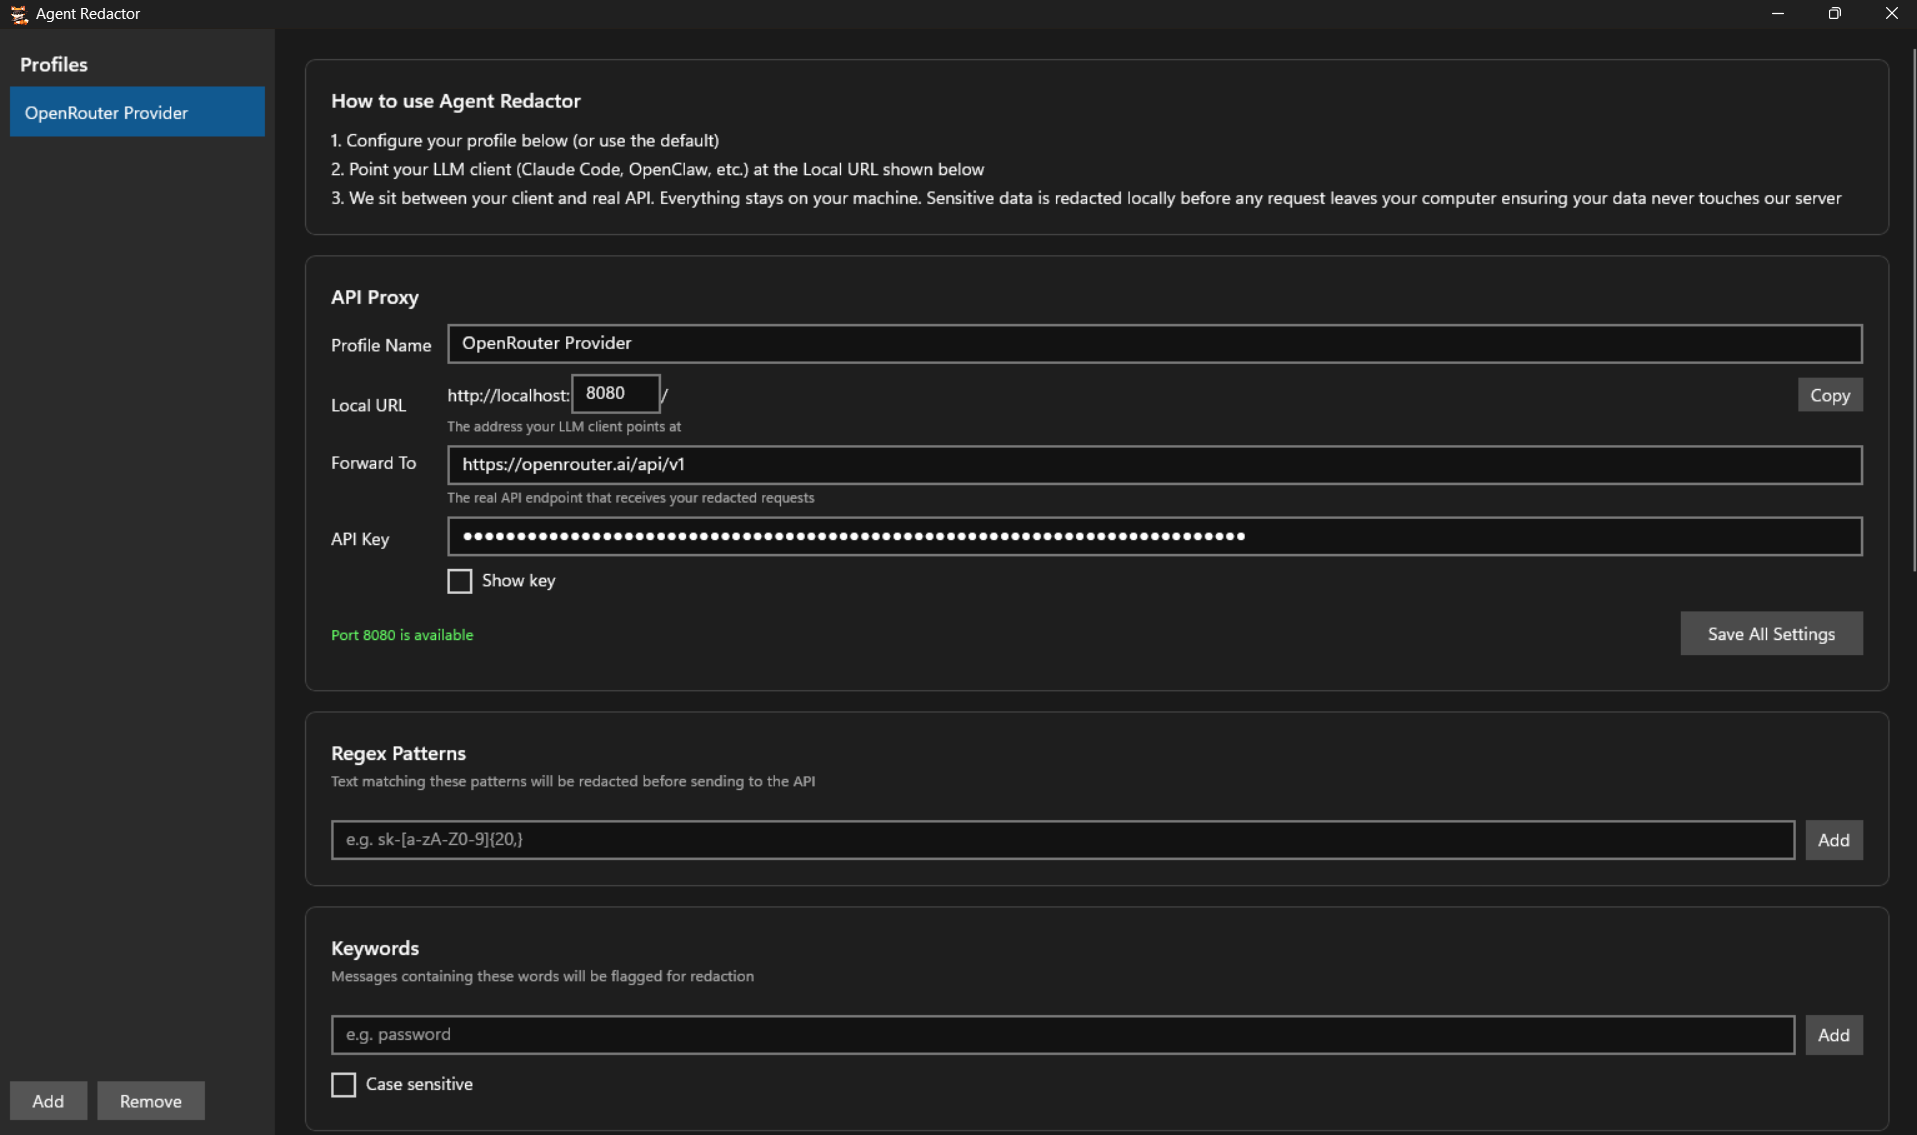
Configure the profile. Local URL is where OpenClaw will connect, Forward To is the real API endpoint. -
Choose your redaction rules
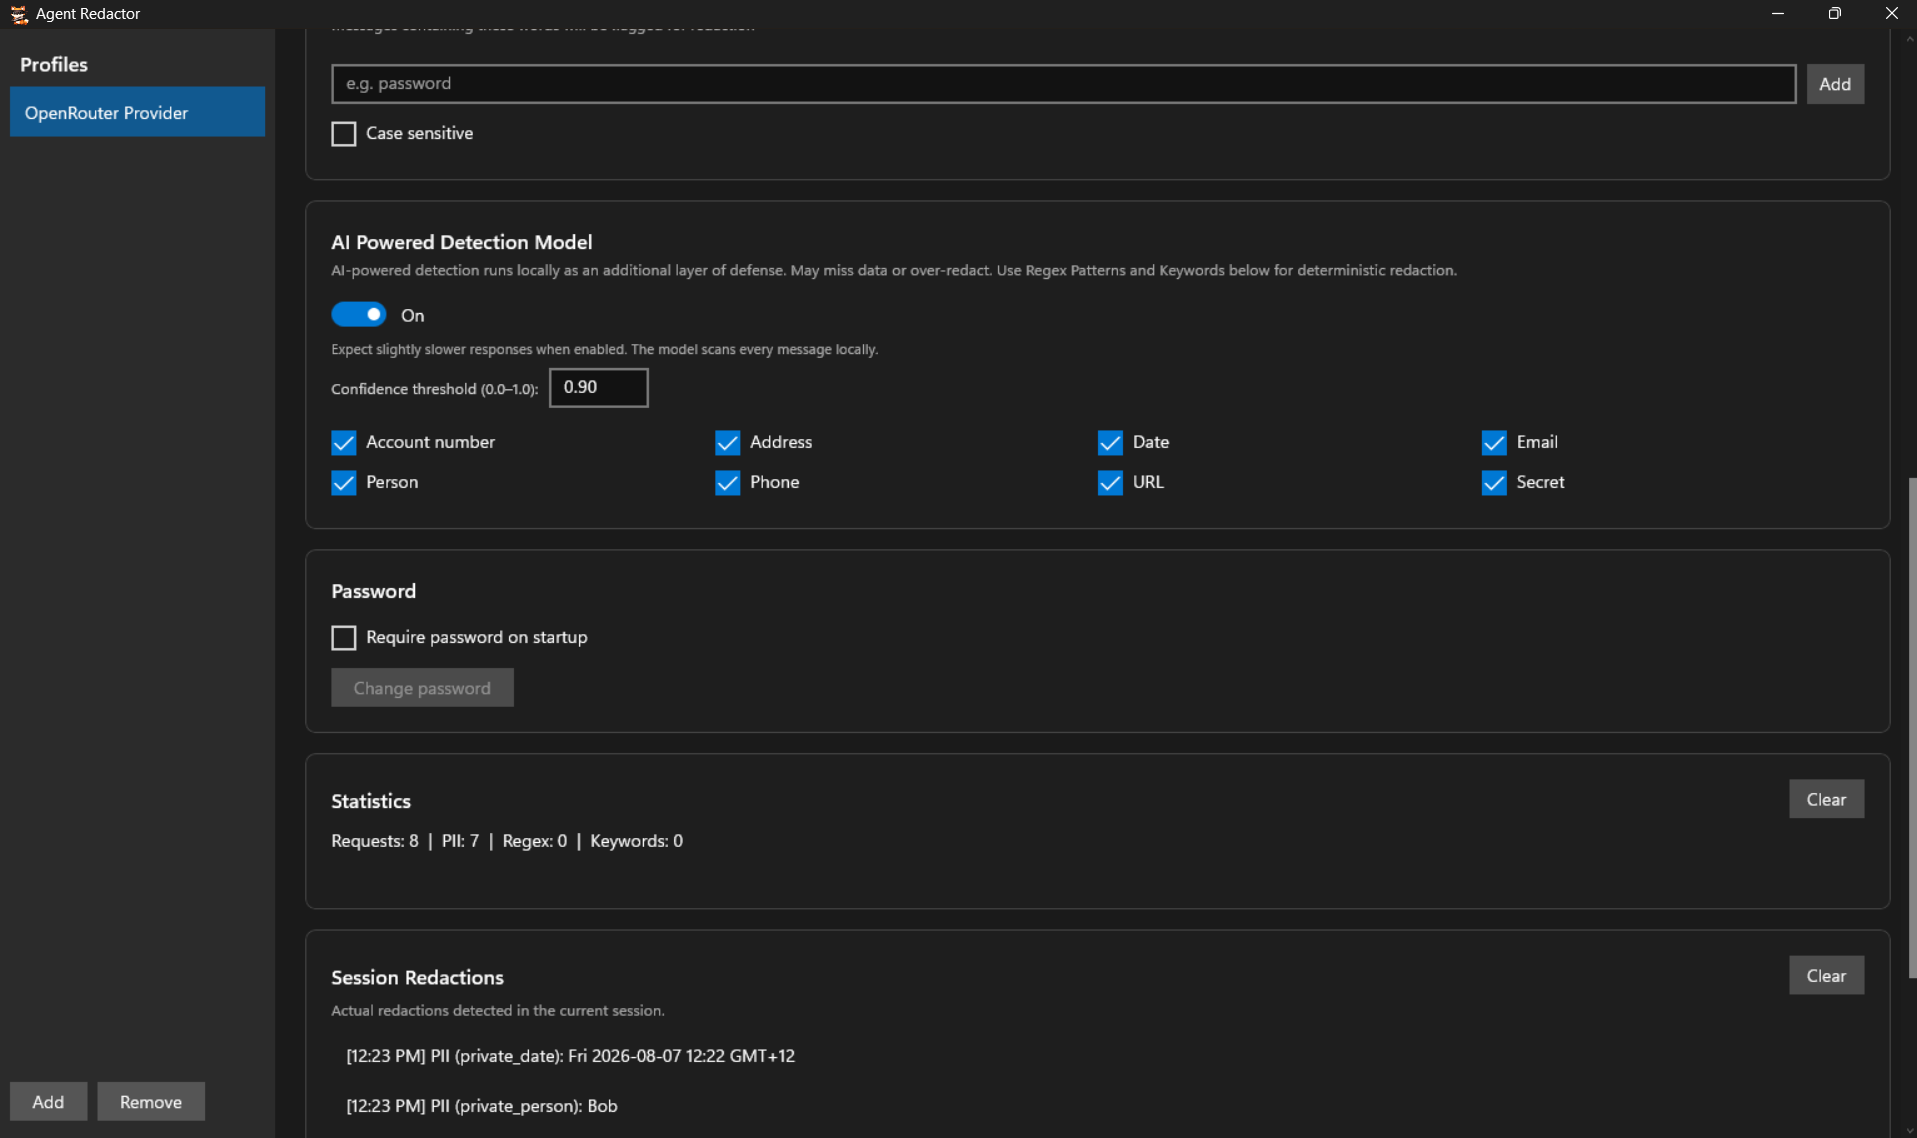
Decide what gets redacted before anything leaves your machine. You can enable the AI Powered Detection Model and tick the PII categories it should catch, add Regex Patterns and Keywords for deterministic matching, or use any combination of the three. The choice is yours. Regex and Keywords are also ideal for project-specific secrets the AI model might miss.
-
Start OpenClaw onboarding
Open your terminal and initiate the OpenClaw setup:
openclaw onboard --install-daemon
Read the security disclaimer and select Yes to continue, then choose QuickStart (recommended) as the setup mode.
-
Connect OpenClaw to Agent Redactor
When OpenClaw asks you to select a Model/auth provider, do not select OpenAI or Anthropic directly. Instead, route through Agent Redactor:
- Model/auth provider: Select More…, then Custom Provider.
- API Base URL:
http://localhost:8080/(must exactly match the Local URL in Agent Redactor) - API key: Choose Paste API key now, but leave it blank and hit Enter. Agent Redactor is already holding your real API key safely.
- Endpoint compatibility: OpenAI-compatible
- Model ID: The exact model from your upstream provider (e.g.
nvidia/nemotron-3-ultra-550b-a55b:free) - Wait for OpenClaw to ping the proxy — you should see Verification successful.
- Endpoint ID: Name it something recognizable, like
agent-redactor - Model alias: Optional, you can skip this
- Image input: Answer Yes or No according to your model's capabilities
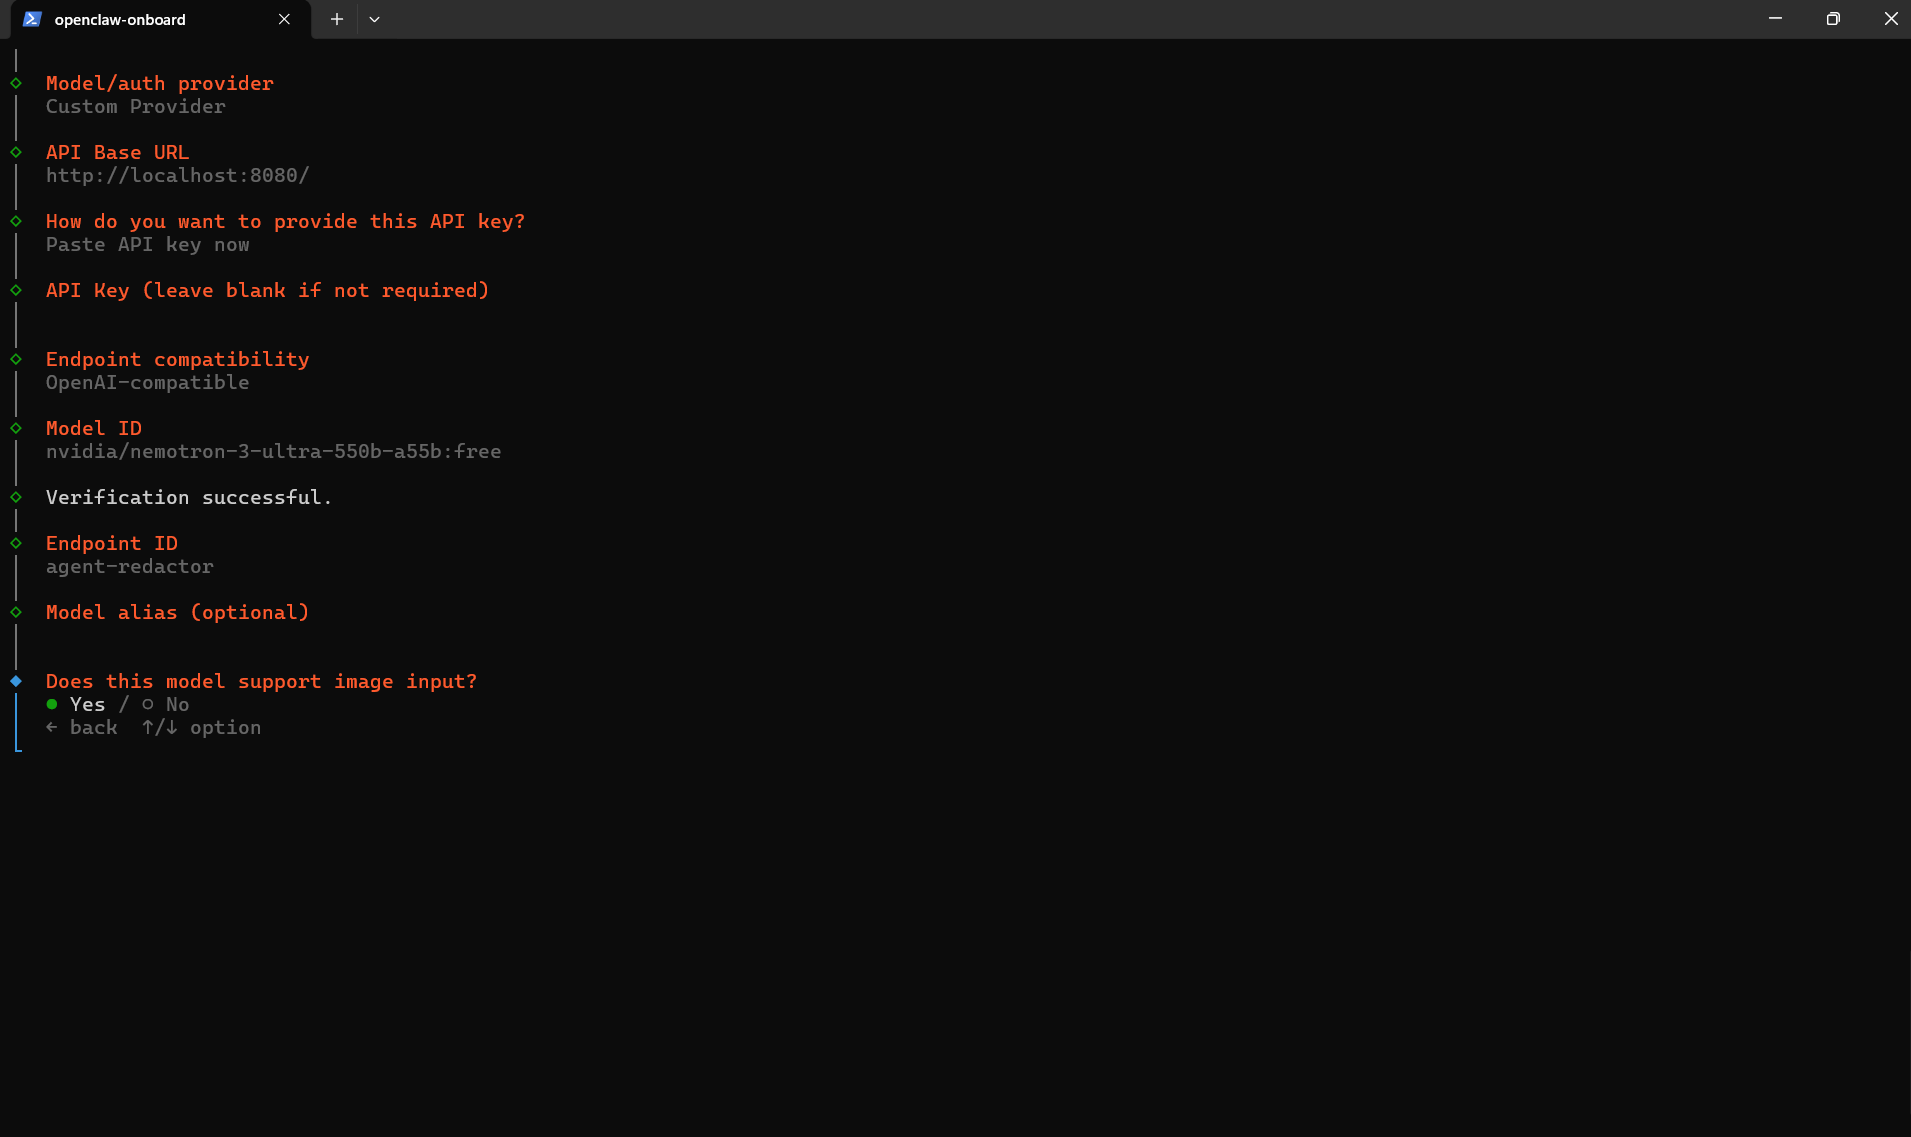
The complete Custom Provider answers, with Verification successful confirming OpenClaw reached Agent Redactor. -
Chat securely
Finish the rest of the OpenClaw prompts, then enter the TUI:
openclaw tuiThe status bar should show your model as
agent-redactor/<model-id>. All outgoing prompts are now filtered locally through Agent Redactor before ever touching the internet.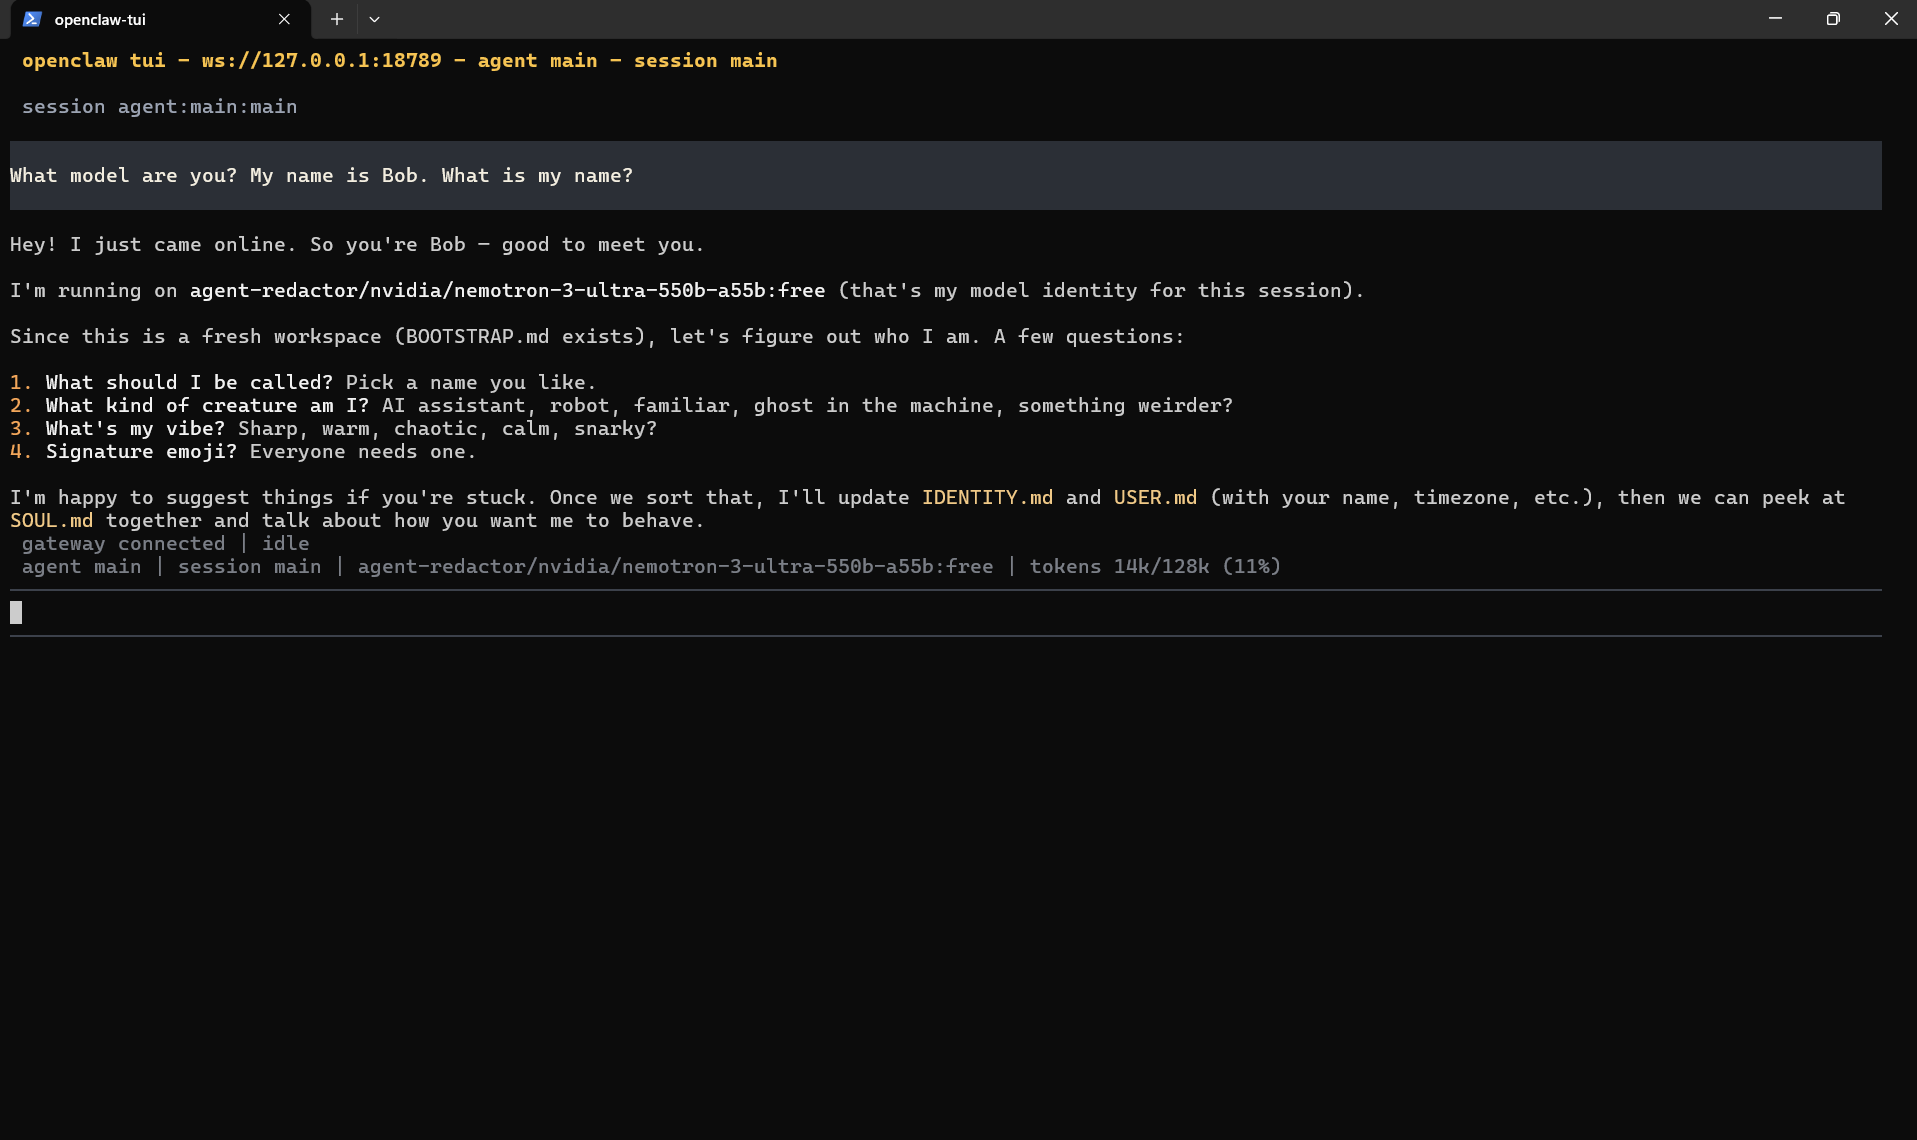
OpenClaw TUI running through the proxy — note agent-redactor/…in the status bar.
Verifying redaction
Check the Session Redactions panel in Agent Redactor to see exactly what was intercepted.